
This blog explains the key steps in a roof installation. It covers inspection, material selection, surface preparation, underlayment, installation, ventilation, drainage, and the final inspection. The guide helps homeowners understand what to expect and why proper installation matters for a strong, dependable roof.
A new roof is a major investment. But getting a good result takes more than choosing new shingles. If the roof is not prepared properly or key details are missed, leaks and other problems can appear sooner than expected.
That is why every part of the installation process matters. A proper inspection, careful preparation, quality materials, and skilled installation all help create a roof that can handle rain, heat, wind, and everyday wear. If you are considering roofing installation Houston TX, knowing the main steps can help you understand what to expect.
Step 1: Inspect the Existing Roof
Every roof installation should start with a detailed inspection. Before new materials are installed, the contractor needs to understand the condition of the existing roof and the structure underneath it.
The inspection may check for:
- Missing or damaged shingles
- Roof leaks
- Worn roofing materials
- Damaged flashing
- Problems around vents
- Water damage
- Weak roof decking
- Previous repairs
The roof deck is especially important. New roofing materials need a strong surface underneath them. If the decking is damaged, those areas may need to be repaired or replaced first. A careful inspection also helps the contractor create a better project plan and estimate.
Step 2: Choose the Right Roofing Materials
The next step is selecting the right roofing materials. Every home has different needs, so there is no single option that works for every property.
The choice may depend on:
- Roof design
- Weather exposure
- Budget
- Desired appearance
- Expected lifespan
- Existing roofing system
Shingles are common on many homes, but a roofing system includes much more than the visible surface. Underlayment, flashing, ventilation, and other components also help protect the home.
Step 3: Remove the Old Roofing and Prepare the Surface
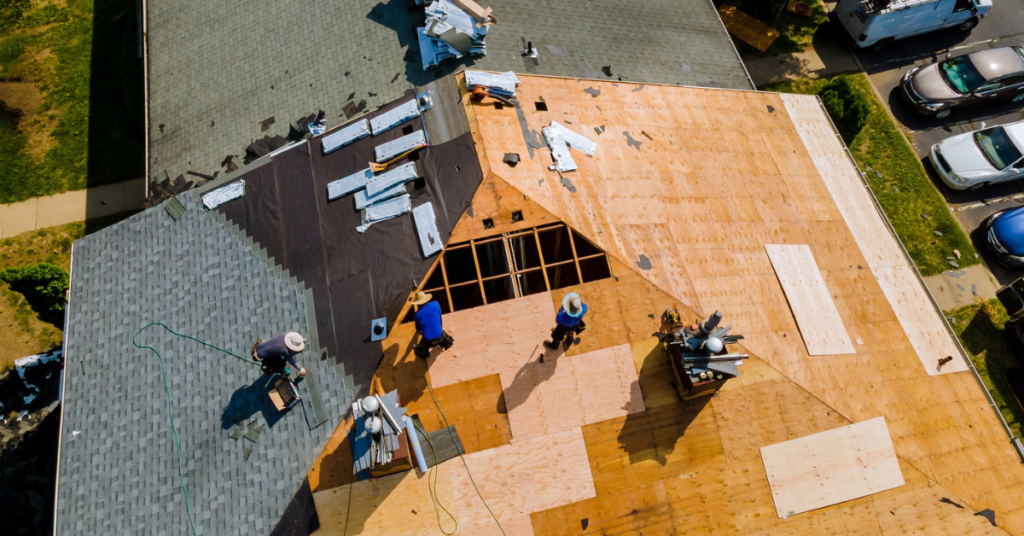
Many roof replacement projects begin with removing the old roofing material. This gives the contractor a clear view of the surface underneath. Once the old material is removed, the roof deck can be checked for damage. Any weak or damaged sections should be repaired before the new roof is installed.
The contractor should also inspect areas around:
- Roof valleys
- Chimneys
- Vents
- Skylights
- Roof edges
- Flashing
This preparation should not be rushed. Installing a new roof over a damaged or poorly prepared surface can lead to problems later.
Step 4: Install the Underlayment and Flashing
The roofing material you see is only one layer of protection. Underlayment adds another barrier between the roof deck and the outer roofing material. Flashing is also important. It helps move water away from areas where the roof meets another surface or where there are openings.
These areas may include chimneys, vents, walls, valleys, and roof edges. Proper installation of these components helps reduce the risk of water getting into the roofing system. Because they are often covered by the final roofing material, this stage needs careful attention.
Step 5: Install the New Roofing Material
Once the roof is prepared, the new roofing material can be installed. This is the stage that most property owners notice, but it is only one part of the complete process. With a shingle roof, each shingle must be placed and secured correctly. Extra attention should be given to valleys, edges, vents, and other areas that may face more water or wind exposure.
Proper alignment and fastening are important. Loose or poorly installed materials can allow water to enter and may reduce the roof’s ability to handle severe weather. For homeowners considering roof installation Spring TX, choosing an experienced roofing professional can help ensure the new roof is installed correctly from the start.
Step 6: Check Ventilation and Drainage
A new roof also needs proper ventilation and drainage. These systems help control moisture and move rainwater away from the property. Good attic ventilation helps manage heat and moisture buildup. Poor airflow can contribute to problems in the attic and roofing system over time.
Drainage is just as important. Water needs a clear path away from the roof. Slopes, valleys, gutters, and downspouts all help move rainwater away from the building. These areas should be checked during installation to make sure they work properly with the new roofing system.
Step 7: Complete a Final Roof Inspection
The installation should end with a careful final inspection. This gives the contractor a chance to find and fix problems before the project is finished.
The final inspection should include:
- Roofing materials
- Flashing
- Roof edges
- Vents
- Valleys
- Gutters
- Visible gaps or loose materials
- Cleanup around the property
A final inspection is more than a quick look at the finished roof. It helps confirm that the important parts of the roofing system have been installed properly. The property owner should also have a chance to ask questions and understand what work was completed.
Give Your New Roof the Right Start
A successful roof installation starts long before the first shingle is installed. Each stage matters, from inspecting the existing roof and choosing materials to preparing the surface and installing the protective layers.
If you are planning a new roof, Restoration Roofing & Remodeling can help you understand your roofing needs. The family-owned company provides roof inspections, repairs, restoration, replacement, storm damage assessments, and residential and commercial roofing services throughout the greater Houston area. Free inspections and estimates are also available.
Contact Restoration Roofing & Remodeling today to schedule a free inspection and estimate and take the next step toward a properly installed, dependable roof.